Installing window air conditioner insulation is a prerequisite for saving on heating costs during winters or cold weather. It helps to keep cold air outside and warm air inside a room. Thankfully, insulating your window AC is less costly and less time-consuming.
If you fail to insulate the window air conditioner, the warm air in your room will leak around the unit’s perimeter. Also, precipitation from the outside will get indoors and reduce the AC’s efficiency. You’ll end up spending a lot of money on heating bills.
The first and best way to insulate a window air conditioner is to follow installation instructions. That’s why we will first look at how to install a window AC. Afterward, you’ll learn how to insulate a window air conditioner to maximize its efficiency.
Things to Consider Before Installing a Window Air Conditioner
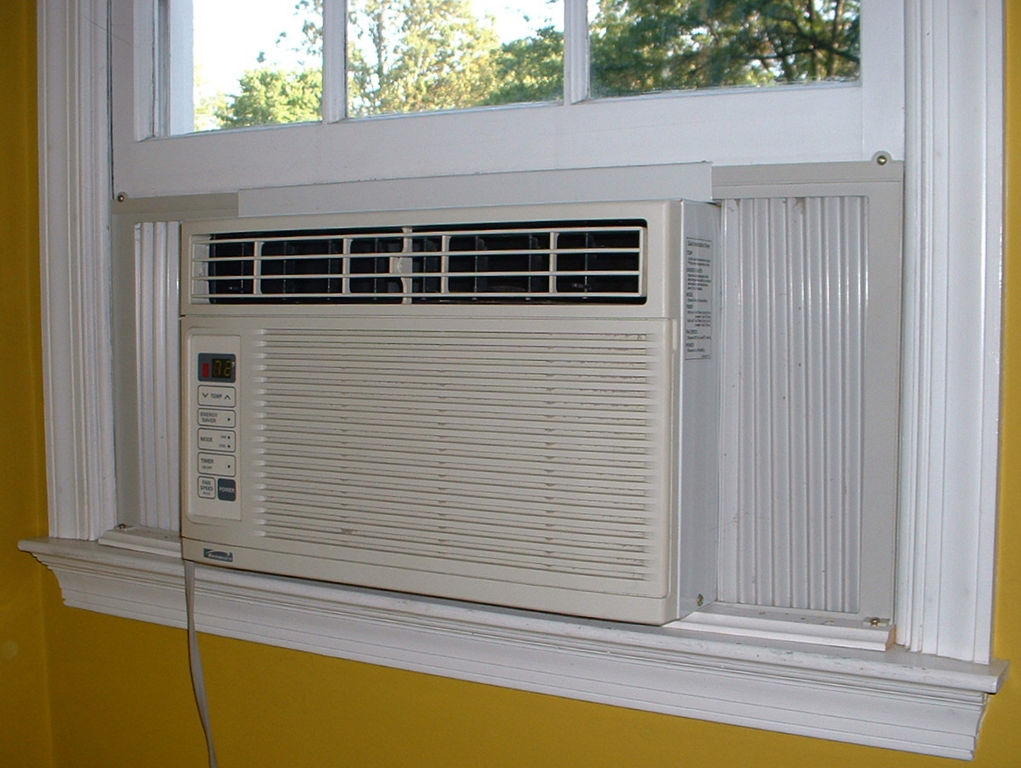
There are many things to know before buying or installing a window AC in your home, including the following factors.
Size of Your Room
Since window air conditioners are of different sizes, the size of your room will influence the cooling capacity of an AC needed. If your room is huge, you’ll need an air conditioner with a higher cooling capacity.
However, if the room is more extensive, but the air conditioner has a lower cooling capacity, it will work harder to cool the entire space. That will reduce the efficiency and lifespan of the window AC and increase your heating bills.
The BTU (British Thermal Units) is the standard unit for measuring an air conditioner’s cooling capacity, and it ranges from 5,000 BTU to 25,000 BTU. Generally, you need 20 BTUs to cool every square foot of your living space.
For instance, if your room is 500 square feet big, you’ll need a window AC with a cooling capacity of 10,000 BTUs. Here are the other recommended cooling capacities for various room sizes.
| Room Size (Sq. ft.) | Cooling Capacity (BTU) |
| 150 – 300 | 5,000 – 7,000 |
| 300 – 450 | 7,000 – 10,000 |
| 450 – 1,000 | 10,000 – 18,000 |
| 1,000 – 1,600 | 18,000 – 25,000 |
Learn more about how to size an air conditioner in this post.
Design of Your Window
Not every window AC fits any type of window. You should first figure out your window’s style, whether it’s a double-hung, slider, or a casement design. Besides, you need to measure the height and width of the window to determine if the AC will fit.
Notably, most air conditioner units fit perfectly in double-hung windows that have a lower sash. You can lower or raise the lower sash, making it easier to install an AC. So, I’ll discuss the installation of the window AC on double-hung windows.
Energy Efficiency of the AC
It’s no doubt that all air conditioners consume a lot of energy. However, you can save on energy costs by choosing an AC with a low Seasonal Energy Efficiency Rating (SEER). That’s why you need to check the SEER number before buying a window AC.
Simply put, the SEER rating is the ratio of an AC’s cooling capacity to the amount of power consumed. For example, if an AC’s cooling capacity is 10,000 BTU and uses 1,000 watts of power, its SEER number will be 10. Read more about SEER ratings here.
Window ACs with higher energy efficiency ratings can help you save electricity and lower your utility bills. An excellent example is an Energy Star certified window AC.
How to Install a Window Air Conditioner for Maximum Efficiency

Installing a window air conditioner seems daunting, and that’s why most homeowners in Phoenix opt for our air conditioning services. Ideally, seeking professional guidance is the best way to go. But if you insist on installing your window AC by yourself, here are some tips.
Here are the tools and materials you will need to install a window air conditioner.
- Window AC unit
- Screwdriver bit
- Scissors
- Tape measure
- Drill with bits
- Insulating foam
Now that you have all the tools and materials needed let’s look at how you can install a window AC for easy insulation. Here are the steps to follow.
Step 1: Inspect the Window
You need to inspect the window to check if it’s in good condition. Check if there’s any obstruction on your window, including storm window screens that can damage the AC’s overhanging part on the outside. You can remove or raise the screen to protect the AC.
As you inspect the window, you should also wash the glass both inside and out. That’s because you’ll probably leave it closed for a few months until when you remove the AC unit. Also, you should clear the clutter around the window to create more working space.
Step 2: Mount the Window AC Unit
To position the air conditioner on your window, you should follow all the manufacturer’s instructions. You’ll raise the window’s lower sash and position the AC at the center of the window. Note that you need another person to help you mount the unit.
While keeping the window AC unit balanced, slide the flange at the bottom of the air conditioner until it leans on the windowsill. Then, lower the lower sash of the window until it rests on the AC’s top flange. Let your helper hold it for subsequent steps.
Step 3: Screw the AC Unit on the Window
Once you’ve lowered the window sash, you need to make sure that it holds the AC unit. Otherwise, the AC unit might fall when the sash gets raised accidentally. You can insert two or three screws through the AC’s upper flange into the window sash.
However, you need to drill the holes first before inserting the screws to prevent the wood from splitting. Also, you should screw two small L-shaped brackets on the top of the lower sash to hold and prevent it from slipping.
Step 4: Fix the AC’s Side Curtains
Most window air conditioners come with two side curtains and frames. You need to fix the side curtains on the AC unit and pull them out to the window’s edges on both sides. You should then screw the curtains on the window frame to hold them firmly.
Notably, the side curtains are perfect insulation around a window air conditioner as it prevents hot air from entering the house. It also helps to prevent bugs from entering the room. Check the manufacturer’s instructions for fixing the side curtains.
How to Insulate Around a Window Air Conditioner
Now that you’ve installed the unit, you need to add more insulation around the window air conditioner. That will prevent the warm air in your room from escaping, especially during winter. So, you won’t spend a lot of money on heating costs.
Here are the steps of window air conditioner insulation to follow.
Step 1: Identify Air Leaks around the AC Unit
After installing the window air conditioner, you need to find the gaps around the unit that could be problematic. Check if you can see daylight around the unit’s perimeter and add more insulation around it. Also, check if there are gaps behind the AC’s accordion flaps.
However, the gaps around the window AC unit may not be visible sometimes. To find the leak points, you should light a candle lighter and hold it indoors near the window AC unit. You should then move the burning lighter around the AC’s perimeter.
If there is an air leak around the AC unit, the flame will flicker. The testing method works best when you plan to leave the air conditioner installed throughout the year.
Step 2: Insulate around the AC Unit
Once you’ve identified all the gaps and holes around the window air conditioner, you need to insulate it using a flexible foam insulation material. Measure and cut the foam insulating strip using a sharp knife and fit it in the gaps and openings discovered.
Some of the gaps that require insulation are the spaces between the glass panes of the upper sash and the lower sash. You also need to insert the insulating foam into the gap between the window frame and the window AC unit body.
Thankfully, most new window air conditioners come with insulating strips/foams. But if the unit has not insulating material, you need to buy one to save on heating costs.
Step 3: Weatherize and Cover the Unit
Weatherizing a window AC unit helps extend its lifespan by protecting it against the damaging effects of rain. Remove the AC’s outer cover to expose all the inner components. Tape a plastic bag around the unit and return the outer cover.
Alternatively, you can buy a fabric cover designed to fit a window AC. Place the cover right over the unit’s outside cover to protect it from precipitation like heavy rains and snow. Thankfully, the fabric covers are available in most hardware stores.
Final Words
Installing an AC is never difficult, especially when you know how to insulate around a window air conditioner. All you have to do is carefully read and follow the window air conditioner insulation guidelines highlighted by the manufacturer.
However, if installing insulation around the window air conditioner seems tedious to you, you can hire an air conditioning specialist in Phoenix to help you. We provide HVAC and plumbing services (including multi stage water filters) in all of Phoenix. The good news is that air conditioner installation and insulation services are affordable.
For more of our content, check out the most iconic and historical sites in Glendale and nearby areas.


