Unregulated water pressure can cause serious damage to your plumbing, more than you can imagine. This can happen when the water pressure from your primary water source is too high. However, this doesn’t have to become your everyday worry.
A water pressure regulator is a handy tool that ensures water in your house flows at the correct pressure. This prevents any damage that the excessive water pressure can cause to your fixtures, which might subsequently lead to costly repairs.
Learning how to install a water pressure regulator is crucial, whether you are a DIY person or you prefer hiring a professional. Therefore, this guide is meant to offer you all the nitty-gritties of water pressure regulator installation to ensure you do it right.
But first things first! Let’s understand what the device is, and how it works.
What is a Water Pressure Regulator?
It is a device used to regulate the pressure of water entering your house from the central city’s supply. Commonly referred to as the PRV (pressure-reducing valve), the device determines the pressure at which water reaches your pipes, allowing safe flows.
This way, the water flowing through your plumbing fixtures, such as the water heater, sink faucets, shower, toilet, or any other appliances, is controlled. In essence, a water pressure regulator determines the PSI (pounds per square inch) of water flowing through your plumbing at any given time.
How to Know if Your Water Pressure Regulator is Working Properly?
Detecting a broken PRV isn’t too difficult. The easiest way is to look at how your faucets react when you turn the water on. If there is pipe knocking, then the water’s pressure is significantly high. However, you need to check well if the pipe’s mounting is loose.
Usually, vibrations and knocking when you turn on your taps are significant indicators of too much water pressure. If you notice such occurrences, ensure that you check what pressure the regulator gauge indicates, and if necessary, tune it down. If this persists, it’s most likely that your regulator is broken and might need changing.
The next and most effective way to monitor your home’s water pressure is by installing an automatic water leak detection device. Such a system will ensure that you’re always on top of matters concerning water pressure in your home.
Smart water leak detection devices give homeowners the freedom to not worry about water leakages. The device notifies you on your phone whenever there is a leak. It also shuts off water mains to avoid any damages.
With that in mind, let’s now get into installing a device.
How to Install Water Pressure Regulator
Firstly, this job should be done by a professional plumber. However, if you know you are good at this and can do it yourself, always ensure that you have the right tools and the proper regulator. Also, know exactly where you’ll be fitting the regulator.
It’s not too hard a task, and quite often, some people prefer the DIY option. Remember, you can even save up to $350 on labor costs if you know how to do it.
So how do you do it? These are the steps:
- Where to Install Water Pressure Regulator
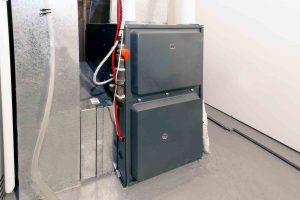
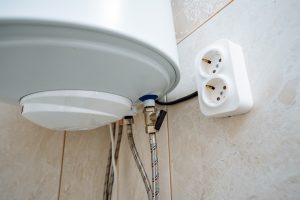
Identifying the correct location to install your water pressure regulator is the most crucial step. A water pressure regulator is usually fixed where the main water line joins your home’s plumbing, just next to the meter. The valve will ensure that water under excessive pressure doesn’t get through to your pipes.
- Measure Your Home’s Current Water Pressure
This is a great way to get the baseline pressure, and you can do so by fastening a pressure gauge onto one of the outside taps in your compound. The pressure gauge will give you the current water pressure for your home. You can get this device from any of the local plumbing shops near you.
According to the “Plumbing Code,” where water pressures exceed 80 PSI, one should use a pressure regulator to reduce this to below 80 PSI.
- Shut Your Water Main
Before trying to fix your water pressure regulator, ensure no water is running through the pipes. Start by shutting down the water main, and then run the faucets to drain the water completely. This will give you an easy time when fixing your pressure regulator.
- Is there an Existing Pressure Regulator?
With an existing pressure reducing valve, the work becomes much easier as you now just need to unscrew it and fasten the new one. For a first-time PRV, first check whether it has an arrow indicating water flow direction (most valves have this). Remember, if you install the valve facing the wrong direction, it won’t work to reduce water pressure.
- Install Your Device
Once you’ve completed all those checks, it’s now time to fix the pressure regulator. The good thing is that the device comes with all the necessary instructions for an easy installation.
First, cut some 6 inches off your pipe after the shut-off valve. Connect the fittings on each end of the cut pipe, and then fix your pressure regulator between the gaps. Fasten it onto the fittings with pliers and ensure that it’s tightly fitted.
- Tune the Pressure to the Desired One
This is the last step when installing a water pressure regulator. Check and adjust the pressure to the desired levels, then turn back your water on from the mains. This is done by turning the screw located on the top of the PRV.
That doesn’t sound hard, does it?
Importance of a Water Pressure Regulator
So, why do you need to control the water pressure in your house? The excessive water pressure might lead to water leaks, eroded washers, banging pipes, and dripping faucets, which can be a nuisance and eventually cause considerable losses. Typically, uncontrolled water pressure is the leading cause of significant home plumbing issues we see every day.
The leaks mean that potable water will go to waste, something that might lead to a surge in your water, sewer, and energy bills. This means that ensuring the flow of water in your house is always within the correct pressure levels can save you some bucks in the long run.
Also, the proper water pressure has a positive effect on your water fixture’s lifespan. You’ll avoid constant damages to your fixtures, ensuring that they give you optimal service. You don’t want to keep changing these fixtures too often as they can cost you a considerable amount of money.
So, what is the correct water pressure for your home’s plumbing appliances? Mostly, your fixtures are built to handle the pressure of around 50 psi. And in the case of the municipal main water line, the pressure might even go up to 150 psi.
Key Takeaway
Typically, not everyone has the time to keep checking the water pressure levels in their homes or even fix broken plumbing fixtures every so often. For this reason, installing simple devices like smart leakage detectors and pressure-reducing valves might ensure that you never have to worry.
With the above guide, I am sure you can now diagnose your home’s water system and even install the pressure regulator with minimal hassle.
Related Posts