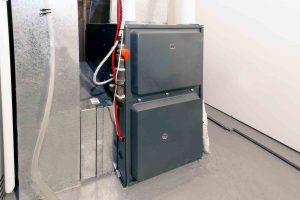

A lack of care and maintenance of the HVAC can eventually lead to the deterioration of the furnace. As a result, you may have to prime the surface to get it ready to function once again.
To DIY prime an oil furnace, you first have to ensure that it is actually out of oil and that there’s no other plumbing or fixture problem with the furnace. While there are professional services available to help you sort out furnace problems, it’s also good to try DIY. In this article, we will take you through the step-by-step process of furnace priming on your own!
DIY Guide on How to Prime an Oil Furnace
Ready to prime and start your furnace? Let’s begin!
1. Run the Basic Checks
Before you get to the priming part, you have to check every part of the furnace to ensure that it’s actually ready for priming. These checks include assessing the fuel tank, the oil lines, and the mechanical or electrical connections of the furnace.
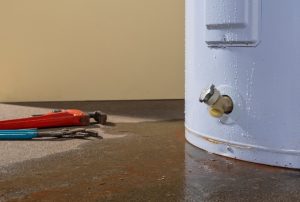
First, you will read the gauge to check if the fuel tank is empty. This will be indicated by an “E” or a “0” on the meter, which may be installed in a wall for an in-ground tank, and on the tank’s wall for a basement tank.
If the furnace hasn’t run out of oil, you may check the oil lines for other problems that may be caused by a lack of priming. If the oil outlets are too murky and greasy, there are chances that their lines are clogged, too. If everything looks fine, you may reset the furnace to jump-start the oil flow. If the furnace doesn’t begin working, you’ll have to follow the next steps to manually prime the furnace.
2. Disconnect the Power Supply
Once you’ve run the basic checks, it’s time to turn off the furnace. For this purpose, your furnace may have a toggle switch somewhere on it. In other cases, you’ll have to break off the connection between your home’s main electrical junction and the furnace. This is an essential precautionary measure to make sure that the furnace is safe for priming.
3. Adjust the Thermostat
To check whether or not your furnace’s thermostat is in the proper condition, you may have to change its settings a bit, too. Once you locate the thermostat on the oil furnace, you should set it at a temperature higher than the current average temperature of the house.
This adjustment will work as a test to check if the thermostat is functioning correctly and is responding to environmental changes. It’ll also confirm whether the oil supply and usage in the furnace are steady or if there’s some other problem that previously went unnoticed.
4. Find the Bleeder Valve
Once you’ve prepared the furnace for priming, it’s time to let it bleed. For this purpose, you’ll find a bleeder valve on the surface of your furnace tank. This valve looks like a hex nut, and it sticks out against the wall of the furnace. However, since it isn’t used often, you may find it a bit difficult to locate this valve immediately. To locate this valve, you may have to refer to the furnace’s manufacturer guide.
5. Loosen the Valve
Once you figure out where the valve is, you’ll take a ⅜ inch wrench to loosen the bleeder valve. This will allow for an opening in the surface through which the oil will bleed through. While you detach the valve cap, keep a tubing system ready to attach to the valve. This will direct the bleeding away from the furnace.
You can place the other opening of the tubing inside a metal container at a safe distance away from the furnace. If the valve is placed vertically away from the furnace, you can place the metal container directly below the valve to catch the dripping oil. This container would be approximately 1 gallon in volume.
When you loosen the valve, the clogging inside the pipes will be disrupted, which will be evident from the sputtering sounds coming from the furnace. As an additional measure, you may place some protective clothing around the valve in case the tubing loosens.
6. Restart the Power Supply
Once you’ve double-checked to make sure that the tubing, the container, and all other parts are perfectly in place, it’s time to bring the power back on. As you flip on the switch or resume power from the main circuit, the bleeder will begin its function of releasing the oil.
This may be pretty erratic and even messy as the power comes back on. Depending on the amount of oil and sludge inside the lines, it may take longer for the bleeding to take place.
However, when you observe fuel dripping inside the container and the irregular sputtering from the furnace, this will mean that the power is successfully back on inside the furnace.
7. Finish the Bleeding
Once the power is back on, you have to wait for the bleeding to be successful before it begins heating again. Depending on the oil, sludge, and air lining the fuel pipes, the bleeding can go on for pretty long.
The smoothness and consistency of the fuel chugging out of the valve or the tube will tell you how long it’ll be before the line is clear. Smooth and quiet bleeding will indicate that the lines have bled fully and completely.
8. Replace the Valve
When you’re satisfied with the bleeding, it’s time to remove the tubing arrangement from the valve. You may close this valve using the hex nut. This will bring the furnace back to life as you’ll see the light coming from the pilot’s window. You’ll also hear a low thump and a steady roaring inside the furnace as it starts heating the oil.
9. Refill the Fuel Tank
Once you’ve ensured that the furnace is functional again, you can top up the furnace’s fuel tank with oil. For this purpose, you can use the emptied-out fuel and pour it back inside the container. While the oil keeps coming in through the lines, a bit of extra, already available fuel will help the furnace to heat up quickly.
And You’re Done!
Furnace priming is a pretty straightforward job that you can easily DIY. Ideally, you need to keep your furnace away from needing thorough priming too often. However, if it needs one, it’s always good to know how to prime it yourself.
Related Posts